There are two ways to record movies with vSolution Link by WolfVision:
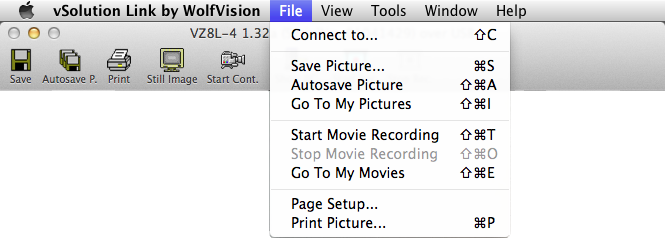
To start the movie recording process, simply start the "Continuous View" mode and press the "Start Movie Recording" button on the tool bar or select "Start Movie Recording" menu item from the "File" menu.
The application will now start to add every captured picture to a temporary movie file until you stop the movie recording or your hard disk gets full.
To stop the recording, just press the "Stop Movie Recording" button on the tool bar or select the "Stop Movie Recording" menu item from the "File" menu.
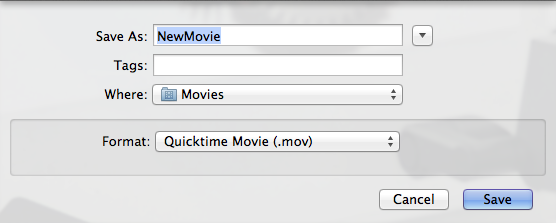
A "Save Movie" dialog box will now ask you for the file name and the location to store the recorded movie. All movies will be stored as Quicktime movie (MOV) files.
To pause a movie recording, simply press the "Pause Movie Recording" button on the tool bar or select the "Pause Movie Recording" menu item from the "File" menu.
To resume a paused movie recording, simply press the "Resume Movie Recording" button on the tool bar or select the "Resume Movie Recording" menu item from the "File" menu.
It is also possible to add only selected pictures captured from the Visualizer to the movie. This is called "Frame By Frame" recording and can be used to create animated video clips. After you've captured the picture you want to add to your movie with the "Still Image" function of the application, simply press the "Start Movie Recording" button on the tool bar or select the "Start Movie Recording" menu item from the "File" menu.
The currently displayed picture will be added to the movie and the recording process will start to wait for the next picture (frame) to be added. Additional pictures can now be captured by using the "Still Image" function and added to the movie by pressing the "Resume Movie Recording" button on the tool bar or select the "Resume Movie Recording" menu item from the "File" menu.
To stop the movie recording process press the "Stop Movie Recording" button on the tool bar or select the "Stop Movie Recording" menu item from the "File" menu.
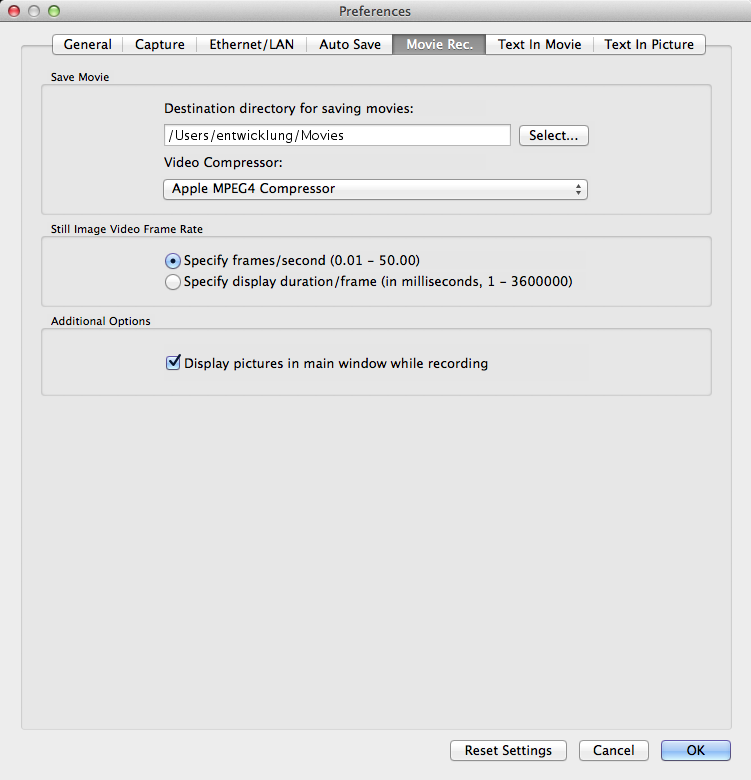
After stopping the movie recording a dialog box will be displayed which asks you for the frame rate value. This value can be entered in two different ways:
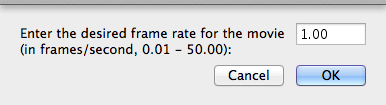
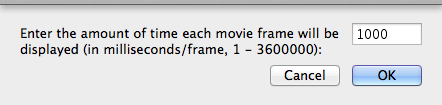
Which way to gather this information the application will use can be specified on the "Movie Recording" tab of the "Preferences" dialog box.
A "Save Movie" dialog box will now ask you for the file name and the location to store the recorded movie. All movies will be stored as Quicktime movie files (MOV).